Sleeve Magic
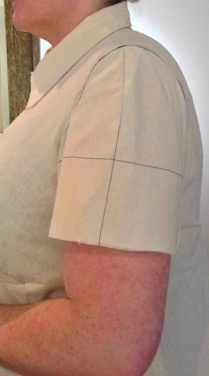
In the past, I’ve gotten the impression that the perfect sleeve is a mythical ideal that can only ever be arrived at with the application of some form of magic. This impression has not been helped by the fact that the set in sleeves on my woven garments have always felt uncomfortable and restricted my movement. In fact, I actually thought sleeves on woven garments could only ever feel that way. My solution, for the past several years, has been to put the same loose sleeve on everything. However, I was assured that this is not necessary and that a wearable sleeve is indeed possible.
So … I’ve spent the last few weeks on my quest for a well-fitted sleeve that gives me the maximum amount of movement.
I’ve learned that there is actually no magic involved in getting a good sleeve. Instead, it requires a lot of time, patience and perseverance. A few weeks may sound like an excessive amount of time to work on a sleeve (full time) but I understand that it is not uncommon for this process to take quite a bit of trial and error, as well as several rounds of muslin fittings, to get a perfect fit. There are no shortcuts! You just have to commit yourself to the process, keep working towards your goal and hope that you don’t go down too many deadends. I have created a Sorting Sleeves tutorial that encapsulates everything I learned, and the steps taken, to get a well-fitting sleeve.
Now that I am on the other side I can also tell you that the effort is worth it. I cannot believe how much better these sleeves are than the ones that I was previously using. Not only do I have an incredible range of movement but they also look so much better!
Making Backups
So … I’ve decided that I need ‘backups’.
If you are familiar with software, and data, you may have heard about the 3-2-1 rule. You need 3 copies, in at least 2 different formats and 1 of those copies should be stored offsite. I’ve decided to use that to guide my pattern backup strategy.
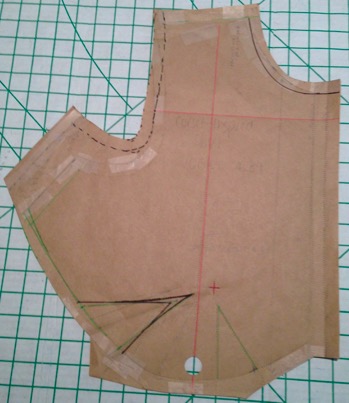
My starting point is the pattern pieces that I have been working with, and modifying, in the cycle of muslin, fitting, pattern alteration then new muslin. These pattern pieces are covered with the lengthwise and crosswise grain line markings (pink highlighter), holes from the tracer wheel (created when I traced the markings using wax paper), green highlighter to mark stitch lines that were updated following the first muslin round, black marker for the stitch lines that were updated during the second muslin round plus miscellaneous additional paper with mountains of sellotape.
Primary Pattern
My first step is to trace my, well loved, perfected pattern pieces on to brown pattern paper.
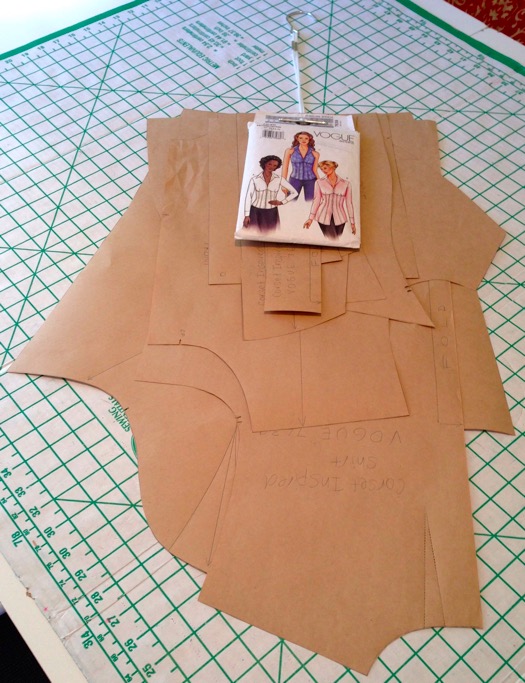
I transfer all the standard pattern markings (i.e., notches, darts etc) but no longer need the grain and cross grain lines that I used for the muslins.
I use my Pattern Punch to create holes in all the pattern pieces and then hang the pattern pieces up, along with the original pattern, using a Pattern Hook.
This will be the primary pattern I use to cut out the garment.
PDF Backup
My next step is to trace original pattern pieces again but this time on to wide white copier paper using a felt tip pen.
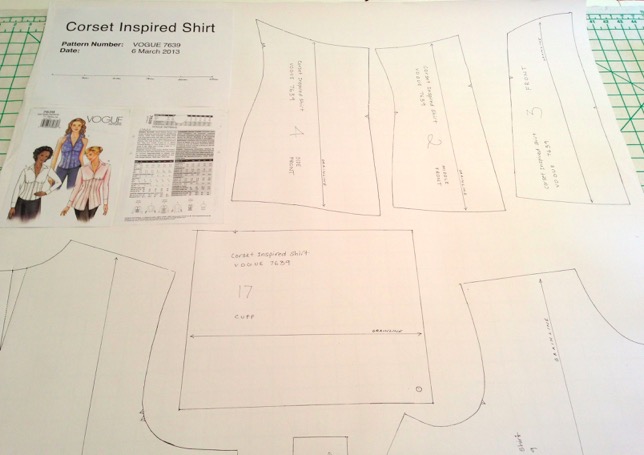
This copy is then fed into a commercial scanner and converted into a PDF file. This service is relatively inexpensive. Mailboxes Etc in Sydney charges approximately $10 per pattern. The cost depends on the length that is being scanned. So, if your pattern pieces were smaller than mine then it would cost a lot less.
If you are considering creating scannable backups of your pattern pieces I would highly recommend including a scale on them. That ensures that, should disaster strike and you need to use them, you can be sure that they have printed out at exactly the same size as they were scanned in.
Paper Backup
With the original perfected pattern pieces having done their job, I roll them up, label them and then keep them offsite.
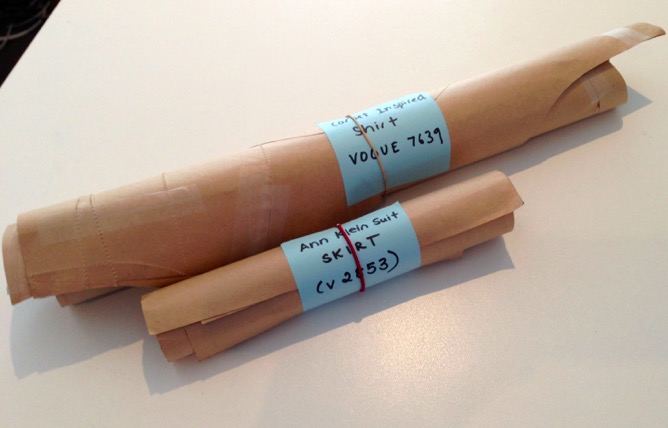
With all of those copies, in different formats and locations I can sleep easy in the knowledge that I won’t lose all of the VERY hard work that has gone in to perfecting my patterns.
Fittings are Hard!!!
Fitting, on the other hand, presents a lot of challenges!
The first challenge is to find a ‘fitting buddy’ who is prepared to work with you, slowly and carefully, to fit the garment to your body. This person needs to be very thorough and patient. I think it is important that you, and your fitter, have the same level of attention to detail. I’m so grateful that my dear husband, Reece, is happy to do this for me - and that he is as fussy as I am.
The second challenge is to find the time. Fitting is NOT something that you can do in five minutes. In my experience, a thorough fitting takes almost an hour for each individual garment. You have to carefully assess each individual element from the top down (i.e., Neckline, Shoulder Line, Back, Top Bodice etc). It is possible that the time required may reduce as we get more experienced but, at the moment, that is how long it is taking.
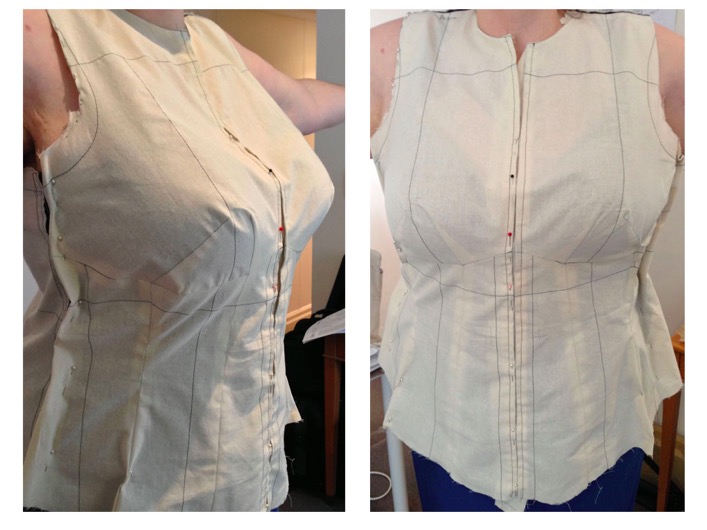
The third challenge is to have to deal with seeing yourself wearing something that may not be very flattering. Prior to being fitted most garments don’t make you look your best. And, it’s made out of calico which is not a great colour and is fairly stiff. The only consolation is that, if you can get the garment to look good in calico - without collars, sleeves or waistbands - then you are sure to get a good result when it is made up in your fashion fabric.
Despite these challenges however, one thing that I am sure of is that the process of making muslin and, then carefully fitting that muslin, is well worth it. It provides you with the opportunity to ‘drape’ the fabric around the body (but with the advantage of being able to use the pattern designer’s ideas as your starting point). It also gives you the chance to check that you are happy with how the garment looks on you - before you commit both expensive fashion fabric and your precious time in putting the garment together. Skipping this critical stage is like starting to write an essay without having planned it out. It results in a less than stellar end product.
I have learned three very valuable lesson regarding fittings over the past month:
- It is ABSOLUTELY vital that you take the time to pin and pinch everything as accurately as you can. Don’t feel as though you can just ‘get the general idea’ and then sort that out when it comes to working with the pattern. We did this early on and it meant that the second muslin was usually way too tight. Taking the time to pin accurately will reduce the risk of you making ‘guesses’ as you alter the pattern which are typically wrong and give you the distinct sense that you are going backwards.
- Once you have a beautifully pinned, and fitted muslin, you need to decide whether you are confident to translate those changes directly to the pattern. Sometimes, it is a good idea to take the time to make the changes to the existing muslin and then put it on again to check that you are happy with those changes BEFORE you apply those changes to the pattern. Lynda Maynard recommends doing this but I have to admit that I haven’t always done that - and that might have contributed to some of the failed second muslins that I’ve had.
- Once you have made the changes to the pattern then you need to decide whether it is worth taking the time to make a whole new muslin. This is a cost-benefit analysis that will depend on the individual pattern and your time constraints. This is where I think a ‘wearable muslin’ (which is made from cheaper fashion fabric) might be a good idea.
Dealing with a Tilted Waist
So … why is this important?
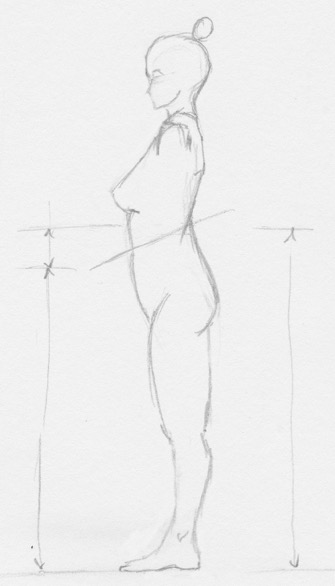
When you have a tilted waist, skirts have a very uneven hem which rides up terribly at the back. What this has meant in the past is that, in order to keep the hem parallel to the ground, I have had to shorten it to match the level at the back. This has often meant that the hem has been much shorter than I would have liked. I suspect that, because the hip line is not falling at my hipline then skirts often twist throughout the day - meaning I am constantly having to straighten them.
A tilted waist also means that shirts just don’t ‘sit right’. I’m constantly having to pull them down at the front. As the waist shaping is not really sitting at my waistline, I’m not getting the right shaping. Finally, I noticed that, I could not get the three measurements, required to locate the bust apex, to meet. The CF Waist to Bust Apex measurement would never meet the other two Bust measurements (i.e., Front Side Neck to Bust Apex and the Apex to Apex measurement). This was because the waistline marked on the pattern was too high and did not reflect my actual waist.
I wasted a great deal of time trying to solve this issue with a clever form of triangulation. Ultimately, the solution turned out to be very simple. It is clearly set out in Sarah Veblen’s excellent book titled The Complete Photo Guide to Perfect Fitting. Essentially, you forget about attempting to alter your tops and just focus on altering your skirts and pants as follows:
- Make a muslin of the unaltered skirt or pants.
- With the muslin on, put a length of elastic around you so that it is sitting comfortably along your tilted waist.
- Mark where the elastic is sitting.
- Adjust the pattern to remove the unwanted fabric above the waistline (remembering you will need seam allowance).
- Make a muslin of the adjusted pattern to check it sits right.
A Fresh Start
Full of enthusiasm, I started out by making up a shirt and skirt that I already had patterns for. I took my time, crafting each element of the garments more carefully than I ever had before. To make the shirt I used the techniques detailed in Pam Howard’s online The Classic Tailored Shirt class - which is wonderful. In the end, I was so proud of the resulting garments. I thought they were beautiful works of art.
What a disappointment it was then to realise that they didn’t look as good on me as I had hoped they would. Why? It was because I had only made very crude adjustments to the patterns and they really hadn’t been optimised for me. After such wonderful initial instruction from my mentor, Charlene Waller, I had gotten into some really bad habits (e.g., just adding width at the side seams and hoping for the best). And, even though I was still making muslins to check the pattern, there was so little for my fitting assistant to work with it was impossible to optimise the pattern at that point. It was silly to have wasted all of that time so carefully working on the garment construction when the underlying patterns were so bad.
Like everything in life, you can’t shortcut the planning and preparation stages in sewing.
So … I threw away the garments I’d so carefully sewn - and the patterns that I had used. It was time to get serious about getting the patterns right!!! And the timing could not have been better because, just at that time, Craftsy introduced two more life-changing online classes.

One thing I did want to mention. Although this course is called “Plus Size” pattern fitting and design, and the first few lessons do cover issues specific to working with plus size bodies, the principles outlined in this course could be used by anyone of any size to customise a pattern to their specific measurements.

The combined power of these two course is hard to overstate.
Let the adventure begin!