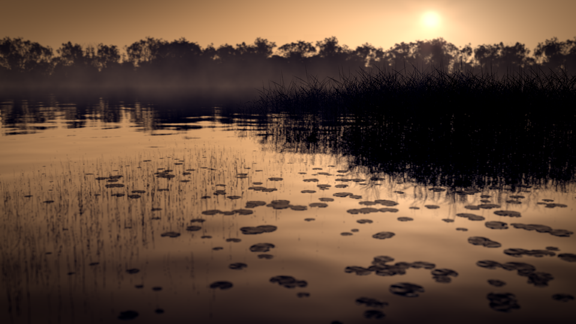
Top 20 Blender Artwork from 2014
01/01/15 00:08
Cool. Coming in at #16, I made the Top 20 Artworks from 2014 on BlenderGuru.com!
Check it out http://www.blenderguru.com/articles/top-20-blender-artworks-2014
Check it out http://www.blenderguru.com/articles/top-20-blender-artworks-2014
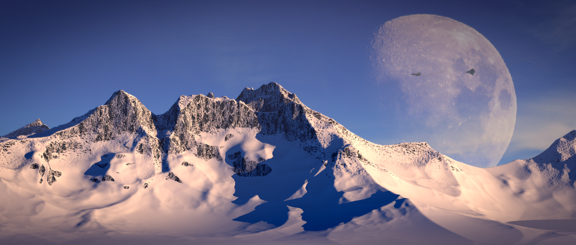
Finalist and #6 Best Blender Artwork of Nov 2014
15/12/14 22:24
Update #1: I was a finalist in the Architecture Academy competition 2014 with my Wood Cabin render -> http://www.blenderguru.com/articles/architecture-academy-competition-2014-results/
Update #2: I was #6 in the Best Blender Renders of November 2014 -> http://www.blenderguru.com/articles/top-10-blender-artworks-november-2014/
Update #2: I was #6 in the Best Blender Renders of November 2014 -> http://www.blenderguru.com/articles/top-10-blender-artworks-november-2014/
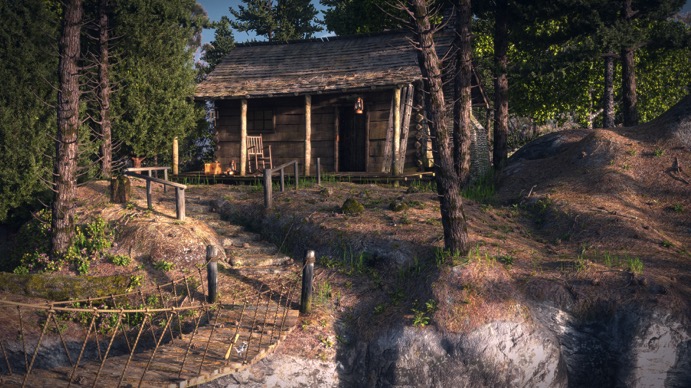
Wood Cabin
02/10/14 20:38
I finally finished my entry into the Architecture Academy course competition for 2014. This is the second run of the course and given I didn’t enter in the first run I thought I’d have a go this time 
This image was modelled using Blender 3D (version 2.72 RC1), rendered using Cycles with textures I painted in Mari and a little bit of Photoshop CS6.
All in all it took me five days of effort from start to finish.
This image was modelled using Blender 3D (version 2.72 RC1), rendered using Cycles with textures I painted in Mari and a little bit of Photoshop CS6.
All in all it took me five days of effort from start to finish.
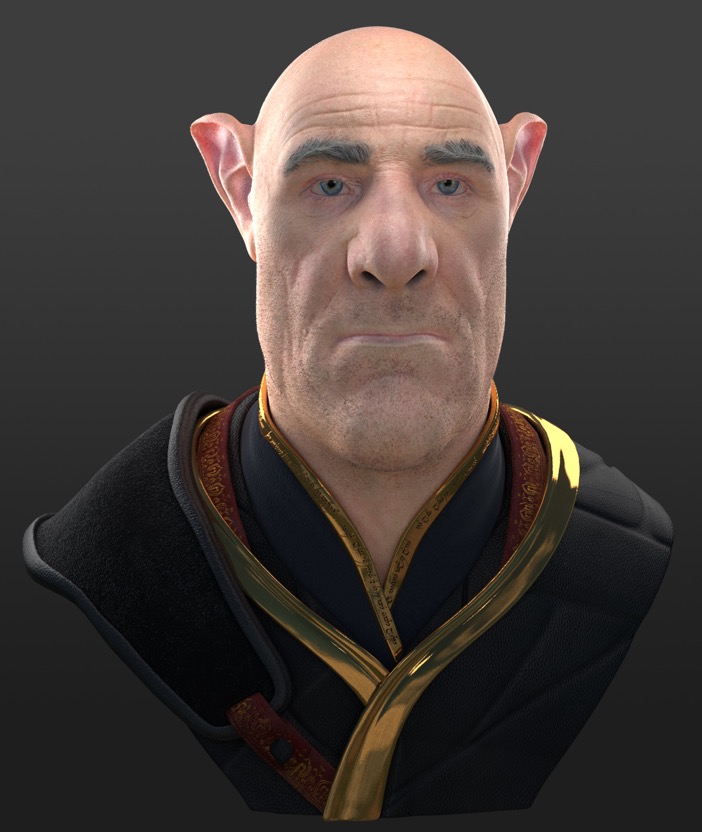
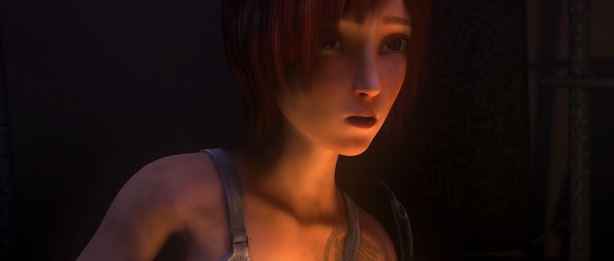
Drow Elf
19/04/14 17:25
I’ve just completed another CG Society 8 week course. This time it was “Realistic Character Texture Painting in Mari 2.0”. This course is given by Justin Holt currently working at Image Engine. His IMDB entry is here.
In this course we learn the techniques of texturing a hero character for film. Similar to the Environmental texturing course I took earlier, the texture sizes are huge. However this time I had Mari, not Photoshop, as my main tool. Mari was developed by Weta Digital for use in the Avatar movie and is a purpose built texture painting application for the film and game industry.
Texture painting in Mari is awesome. Mari has most of the familiar settings you are use to from Photoshop.
To render the final image you see below I used Cycles which is part of the Blender3d application. Justin used Arnold for his render and others on the course used v-ray however those require commercial licenses and I don’t have the spare cash at the moment.
One BIG limitation in using Blender3d is that it does not support the UDIM texture space used in Mari and other commercial 3D apps. This was a real blow as Blender only supports a single texture square. I thought I’d never see a render of this character as this was a show stopper. However The Foundry just released Mari 2.6 which has a feature for transferring texture channels from one UV layout to another. This was all I needed to transfer the many UDIM patches in the Drow Elf model to a single patch suitable for use with Blender3d!
When it came to rendering the trickiest part was figuring out how to use the Sub-Surface Scattering (SSS) material node correctly in Cycles.
Here is the model we were given at the start of the course. We had to come up with a paint concept and execute it during the course.
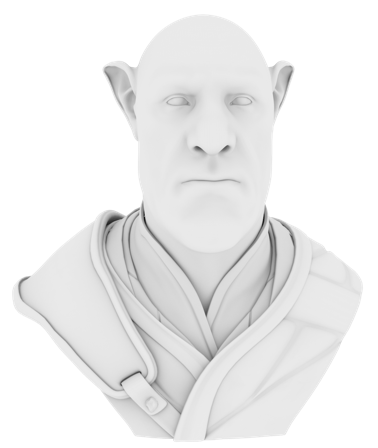
This is my final render.
Wasteland 2 Radio Tower Asset
29/05/13 12:46
My third successful game asset submission to inXile entertainment. This time I wanted to create a radio communications tower. My electrical engineering training helped a lot with this one. The model has 7998 tris with a texture size of 2048x2048. The material has a colour with spec map, alpha map and a normal map baked from a high poly version.
It is available in the Unity3d Asset Store.
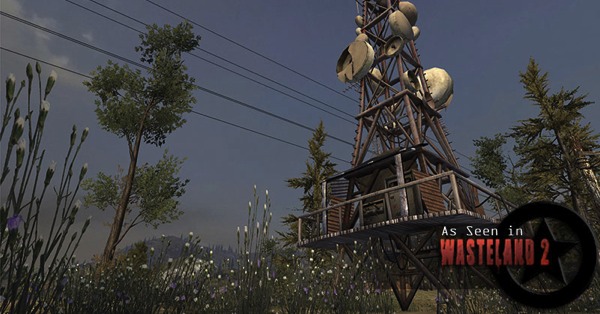

It is available in the Unity3d Asset Store.
Wasteland 2 Lookout Tower Asset
09/05/13 12:29
Another successful submission to inXile entertainment. This time I created a lookout tower made out of a wrecked passenger train carriage. It is available in the Unity3d Asset Store. This model has 2997 tris with a texture size of 2048x2048. The material has a colour with spec map, alpha map and a normal map baked from a high poly version.
I have been including the source blender model and high-res (4096x4096) layered photoshop files in the asset download from the store for users to modify the asset as they wish. Hopefully providing the source material won’t backfire in any way.
Here is what it looks like in Unity.
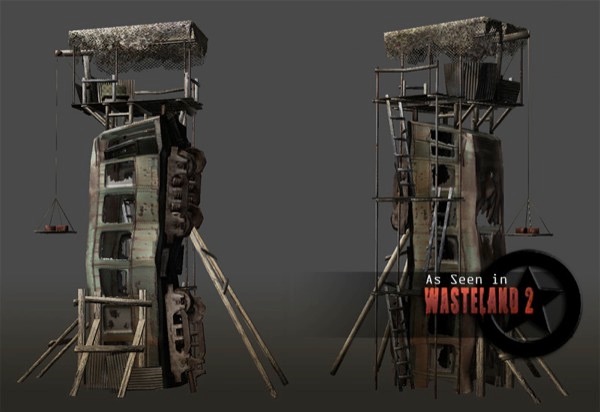

I have been including the source blender model and high-res (4096x4096) layered photoshop files in the asset download from the store for users to modify the asset as they wish. Hopefully providing the source material won’t backfire in any way.
Here is what it looks like in Unity.
Wasteland 2 Game Character Creation
31/01/13 22:26
Having freshly finished the texturing workshop I was looking for a project to practice my new skills.
I saw that a game company, inXile entertainment, had just started asking for crowed-sourced game models for their KickStarter funded re-make of a 1988 era game - Wasteland.
I decided to try and create the Slicer-Dicer droid based on the provided concept art. I had two weeks to model, texture (colour, spec & normal), rig and animate it. If they accept my version then they would buy it from the Unity3d Asset Store and include it in the game and give me a game credit.
I started by modelling a detailed high-poly version of the character and baked those details into a normal map for a low-poly (3500 tris) version. After UV unwrapping the low-poly model I then created the textures. Once it was textured I rigged the model with an armature and bones. I used Inverse Kinematics (IK) to control the legs and appendages. This made it easy to create walk, run and attack actions as well as an idle action.
Here is what I came up with.
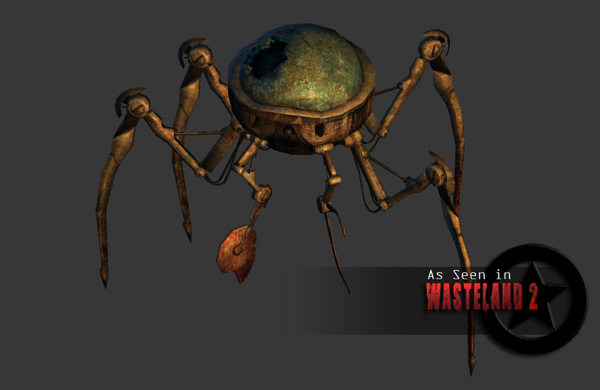
The characters in the Wasteland universe have a worn out look because industry shut down decades ago and new parts are impossible to come by.
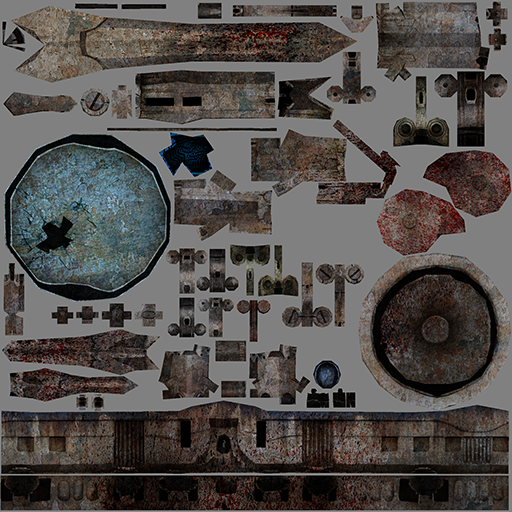
Here is a small version of the 2048x2048 pixel colour map I created for it.
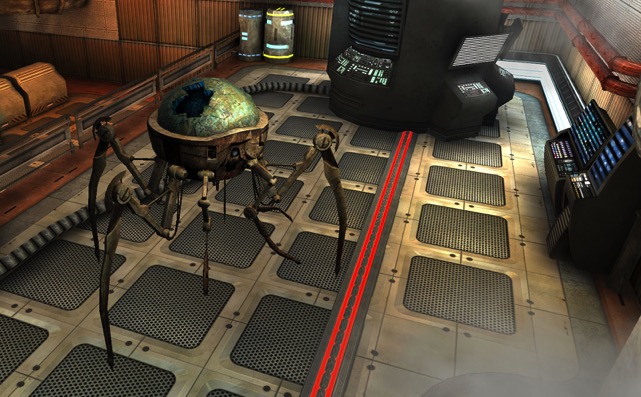
Here is a screen grab of the Slicer-Dicer in an example Unity3d scene.

I saw that a game company, inXile entertainment, had just started asking for crowed-sourced game models for their KickStarter funded re-make of a 1988 era game - Wasteland.
I decided to try and create the Slicer-Dicer droid based on the provided concept art. I had two weeks to model, texture (colour, spec & normal), rig and animate it. If they accept my version then they would buy it from the Unity3d Asset Store and include it in the game and give me a game credit
I started by modelling a detailed high-poly version of the character and baked those details into a normal map for a low-poly (3500 tris) version. After UV unwrapping the low-poly model I then created the textures. Once it was textured I rigged the model with an armature and bones. I used Inverse Kinematics (IK) to control the legs and appendages. This made it easy to create walk, run and attack actions as well as an idle action.
Here is what I came up with.
The characters in the Wasteland universe have a worn out look because industry shut down decades ago and new parts are impossible to come by.
Here is a small version of the 2048x2048 pixel colour map I created for it.
Here is a screen grab of the Slicer-Dicer in an example Unity3d scene.
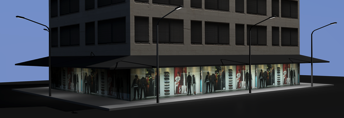
Environment Tetxuring
15/01/13 20:39
I have just completed another intensive eight week course with the CG Society. This time it was Environment Texturing by Leigh van der Byl.
In this course we were taken through the entire process of creating all the basic required textures for a street scene, starting from the process of gathering appropriate references, to creating rough concepts, to creating colour, bump, specular and reflection maps. Additionally, we were taught about fundamental industry standards, such as deciding on appropriate sizes for texture maps, and optimising work based on shots.
The level of detail and finish we were going for was that used in modern movies where the texture sizes are huge at 8192x8192 pixels! So each building colour texture file with all its Photoshop layers was about 700MB.
The bare clay street scene model was provided but I took it from there to produce this completed scene.
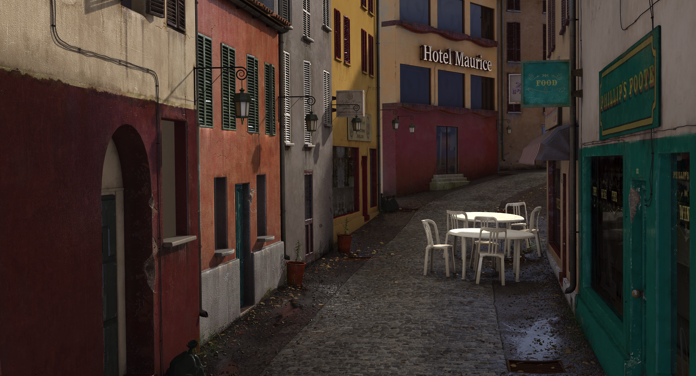
Here is a close-up of the cafe.

In this course we were taken through the entire process of creating all the basic required textures for a street scene, starting from the process of gathering appropriate references, to creating rough concepts, to creating colour, bump, specular and reflection maps. Additionally, we were taught about fundamental industry standards, such as deciding on appropriate sizes for texture maps, and optimising work based on shots.
The level of detail and finish we were going for was that used in modern movies where the texture sizes are huge at 8192x8192 pixels! So each building colour texture file with all its Photoshop layers was about 700MB.
The bare clay street scene model was provided but I took it from there to produce this completed scene.
Here is a close-up of the cafe.
Another Game Models Accepted by Unity3d Asset Store
23/10/12 22:18
Here is my second game asset now available in the Unity3d Asset Store here. This time I thought I’d tackle the classic metal barrel.
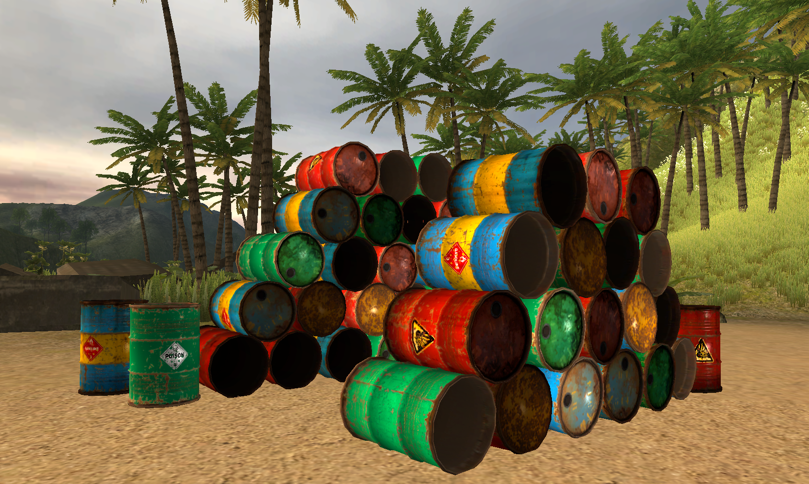
Here is the model sheet.
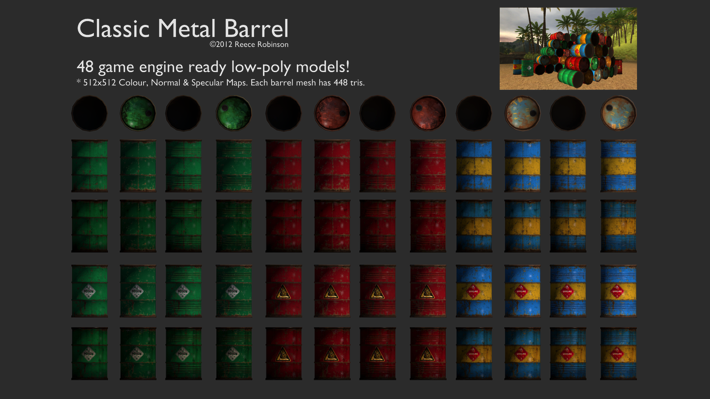
Here is the model sheet.
Game Models Accepted by Unity3d Asset Store
20/09/12 22:22
Finally I got around to creating my first game model for sale in an online model asset store. I chose to create models for the Unity3d game engine (although the models will work with many other game engines). Unity3d has an integrated store in their game editor so game makers can browse and buy models for their games without leaving the application.
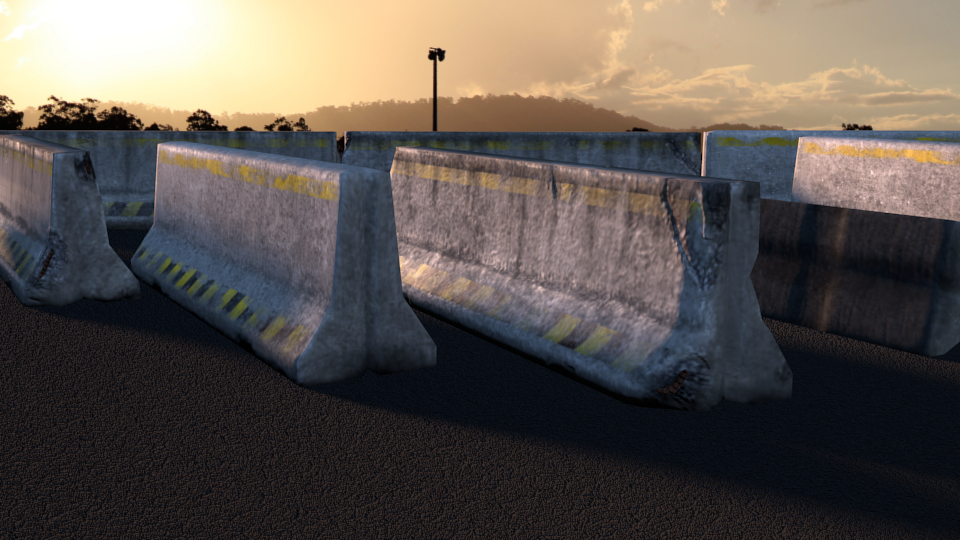
For my first model I thought I’d play it safe and create the classic concrete barrier that appears in most first-person-shooters. Even though this is a very simple type of model I wanted to ensure it was as high quality as it could be. So I sculpted the details of a plain and damaged barrier using Blender3d’s sculpting tools and backed the details into the nomal maps. This provides a high level of detail for a low poly model. Here is the final result in a model sheet.
You can view this model package in the asset store.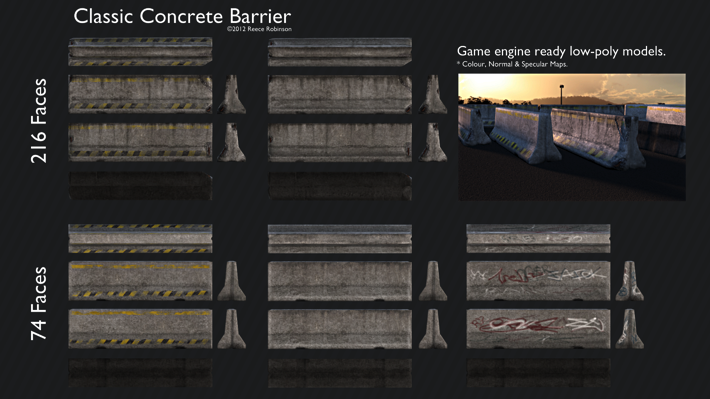
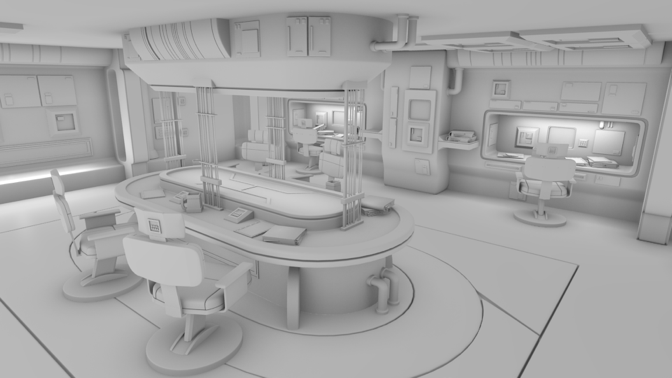
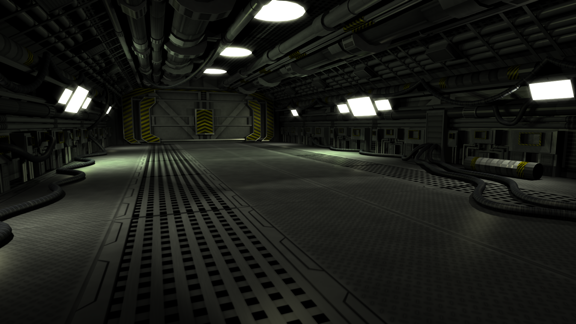
Ship Interior Model
16/07/12 22:26
I wanted to practice modelling a complete game ready scene so I created the following ship interior model from scratch using the excellent reference art of fattypants.

The Nature Academy
29/04/12 23:21
I signed up to Andrew Price’s 12 week Nature Academy course to learn the tips and tricks of 3D modelling of the natural world.
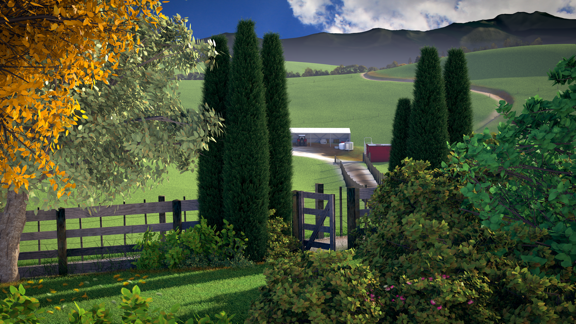
Each week introduced a different aspect of nature from grass to trees to rivers, oceans, lakes, rocks and mountains. It was an excellent course! The header image to this blog entry is an original image I created as my final assignment. It is based on a photo I took on when staying at a farm B&B just out-side the township of Pirongia, New Zealand.
Here are some of the images I created while completing the weekly set work assignments.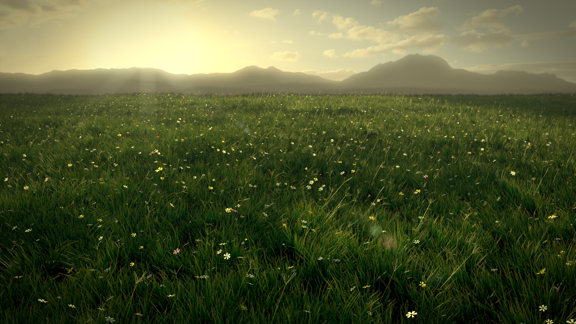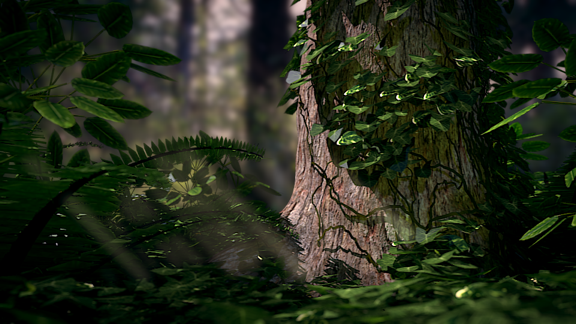
Low Poly Building
06/04/12 20:07
I was inspired by BlenderGuru’s tutorial on “How to create a city” to try a low poly building I could use in a game engine. Here is my first building. The total scene has 3084 faces which includes the street lights etc.
Flame Thrower
21/05/11 18:53
Blender is now stable enough for me to try out the smoke simulation capability.
Here is my version of the BlenderGuru.com “Flame Thrower” tutorial. The simulation features of the new 2.5 series are just amazing.
Check it out!
Here is my version of the BlenderGuru.com “Flame Thrower” tutorial. The simulation features of the new 2.5 series are just amazing.
Check it out!
Red Barrels Inc.
16/04/11 18:56
I thought it was about time I actually completed some of the BlenderGuru.com tutorials. This image is my attempt at the “Red Barrels” tutorial. It was a lot of fun to do.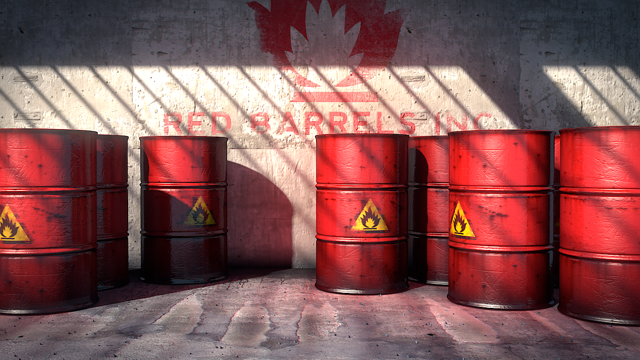
Sintel
14/10/10 18:59
The third open movie “Sintel” has been released by the Blender Foundation. The first movie was “Elephants Dream” followed by “Big Buck Bunny”.
If you look carefully you will see my name in the final credits!
If you look carefully you will see my name in the final credits!
1920’s Rocket Ship
17/06/10 19:04
This is my third (and final) entry into the Weta Workshop Ray-gun Shootout competition. I managed 13th out of 52 entries by popular vote. This brief was to design a rocket-ship that truly represented the 1920’s era.
You can see the turn-table animation of this entry on the competition site here or on this page below.
UPDATE:
Green Button are using my 1920’s Rocket Ship in their online advertising campaign. See following web ad:
You can see the turn-table animation of this entry on the competition site here or on this page below.
UPDATE:
Green Button are using my 1920’s Rocket Ship in their online advertising campaign. See following web ad:

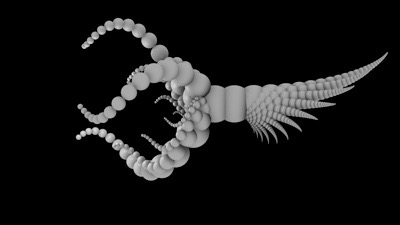
Alien Ray-gun
11/05/10 19:13
This is my second entry in the Weta Workshop Ray-gun Shootout competition. I managed 3rd out of 26 entries by popular vote. This brief was to design an extraterrestrial aether oscillator, wave disruptor or infinity beam projector.
In this design I wanted to explore the use of self-symmetry in organic design. The base of this design used a simple sphere as shown below.
You can see the turn-table animation of this entry on the competition site here or on this page below.
In this design I wanted to explore the use of self-symmetry in organic design. The base of this design used a simple sphere as shown below.
You can see the turn-table animation of this entry on the competition site here or on this page below.
Nightmare Ray-gun
15/04/10 19:20
This is my first entry into the Weta Workshop Ray-gun Shootout competition. I managed 19th out of 69 entries by popular vote.
For this design I was looking at the 50’s & 60’s science fiction style.
For this design I was looking at the 50’s & 60’s science fiction style.
You can see the turn-table animation of this entry on the competition site here or on this page below.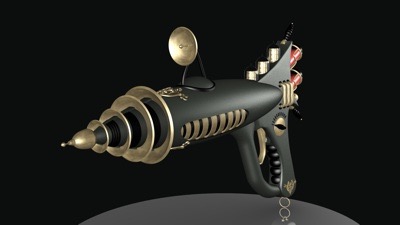
Yo Frankie!
14/10/08 19:26
The first Blender Foundation open game “Yo Frankie!” has been released!
This project has resulted in a massive upgrade in the blender game engine components and established blender as a serious tool for game development.
If you check out the credits you will see me there!
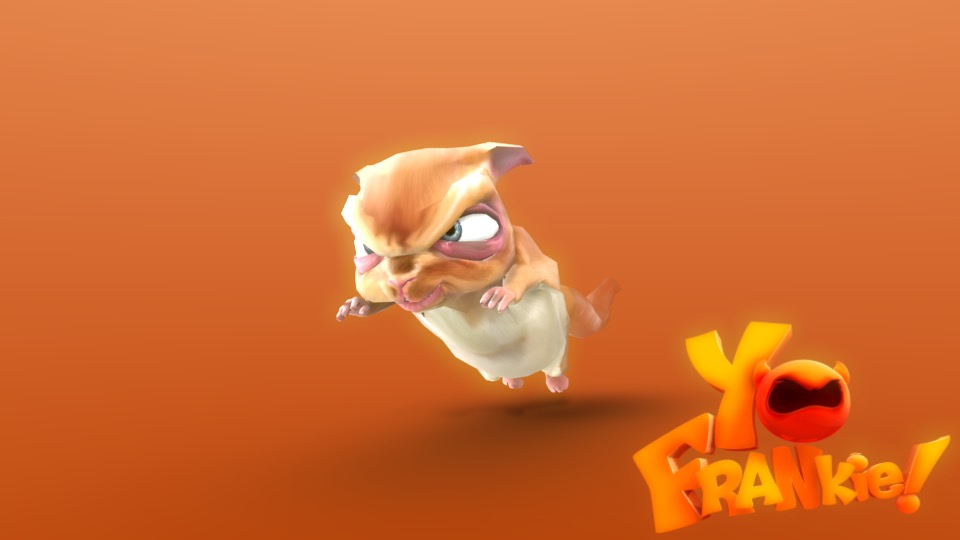
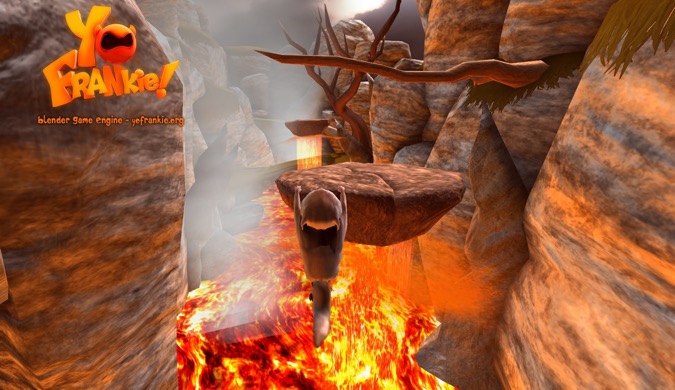
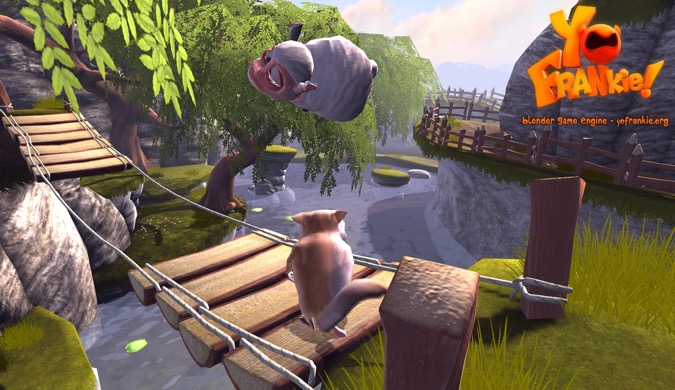
This project has resulted in a massive upgrade in the blender game engine components and established blender as a serious tool for game development.
If you check out the credits you will see me there!
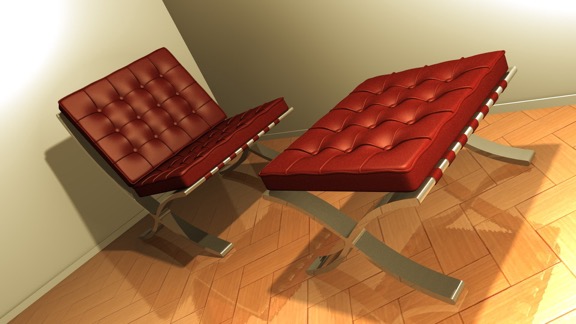
Chair
17/08/08 19:33
I have been reading the new Blender Architecture book and saw a nice tutorial in Blender Magazine Italia #2. This inspired me to create this image.
Big Buck Bunny
29/04/08 19:36
The movie is finally here! Check out Big Buck Bunny, an Open Movie created at the Blender Institute.
Blink and you’ll miss my credit at the end of the movie

Blink and you’ll miss my credit at the end of the movie
3D Game Textures
05/04/08 19:56
I am working my way through “3D Game Textures: Create Professional Game Art Using Photoshop”. Although this book is aimed at Photoshop users, I decided to try and create the textures from within Blender. I.e. instead of trying to “fake” the ambient occlusion effects etc, I just created the 3D geometry for each texture and rendered it to an image I could use for UV texture mapping. I made good use of Blender’s material nodes to create the base metal texture.
Hard Surface Textures
13/01/08 20:03
Here is my latest Blender effort. The goal in producing this image was to learn the techniques of creating hard surface textures.
For this project I followed the excellent tutorial by Stefan Morrell here.

For this project I followed the excellent tutorial by Stefan Morrell here.
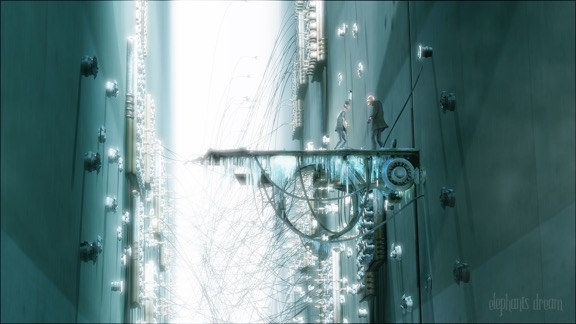
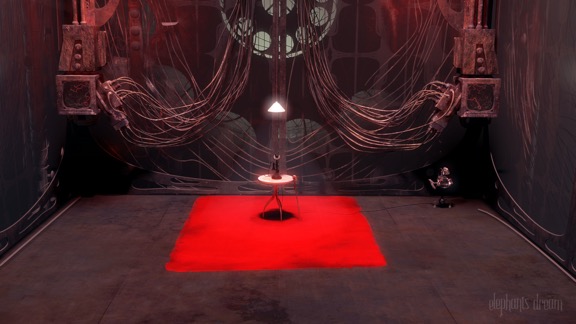
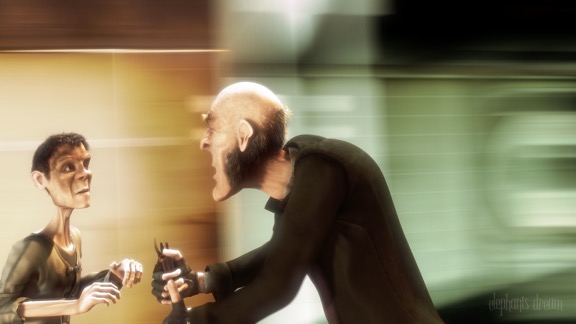
Elephants Dream
24/03/06 18:41
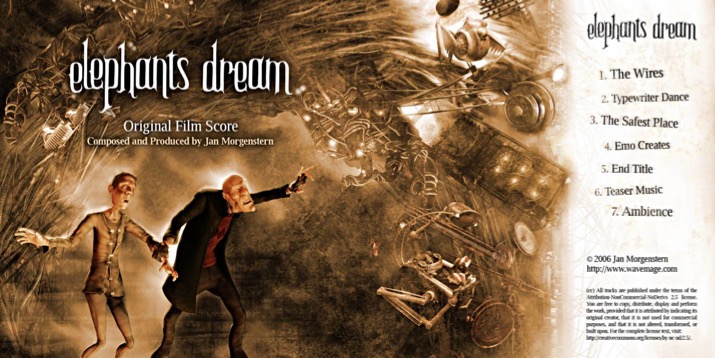
Check out the first “Open Movie” Elephants dream. This movie started production just as I was first discovering Blender.